Whole Home Energy Monitoring
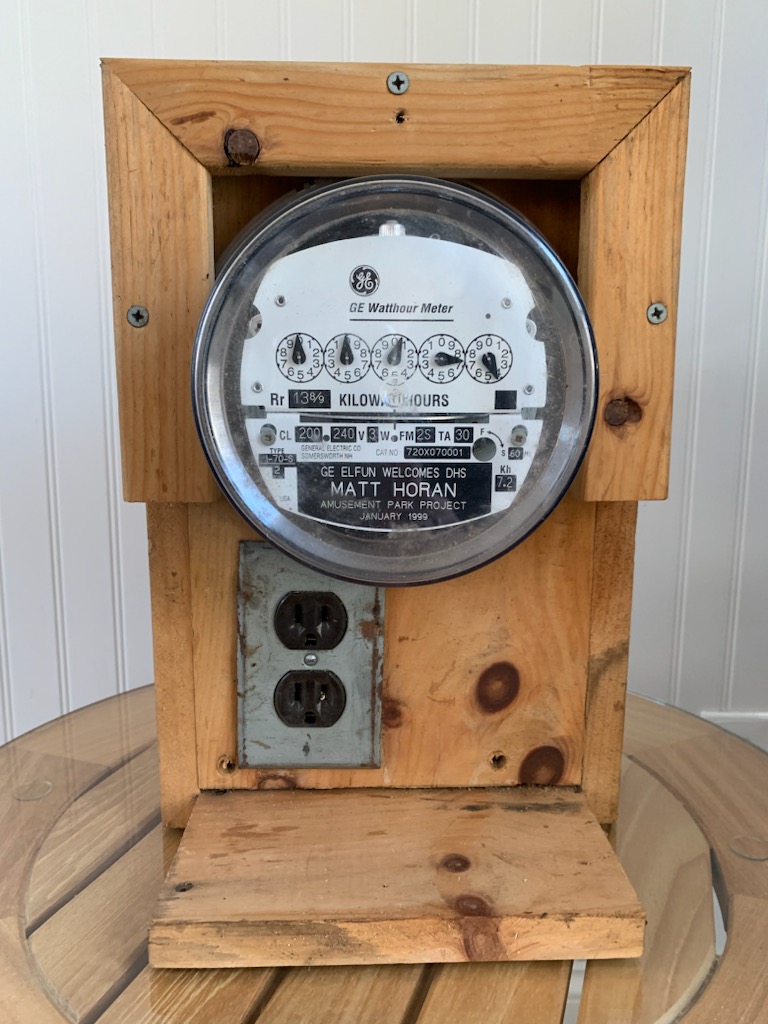
I’ve been interested in energy monitoring for some time. Growing up, my dad worked at General Electric in their meter division. I always got to play with electric meters and found them fascinating. At one point he even brought home a meter and we built a housing so that I could measure the electricity usage of an attached electrical socket! Energy monitoring has gotten a lot simpler these days, and Shelly has a bunch of easy to use devices that I’ve written about previously.
A few years ago, ConEd rolled out “real-time usage” along with their smart meters. I stumbled across a script that would scrape the ConEd site and dump the usage into a database. I eventually ported that script over to use python-mechanize, as the headless Chrome version of the script was very unstable on my GKE instance with shared (burstable) CPUs. This script worked great, however it was far from “real-time”. The measurements were taken every 15 minutes, and the data can be delayed by hours.
Home Assistant has support for energy monitoring as well. However, importing this “real-time” data creates a problem. Home Assistant expects the imported data to correspond to the time it is imported, and doesn’t support importing historical data. This makes the ConEd “real-time” data rather useless to Home Assistant. However, thanks to Shelly’s line of energy monitoring devices, it’s easy to bring actual real-time data into Home Assistant!
There are some alternatives to Shelly devices for the DIYer, and details can be found in the Home Assistant docs. However, for those who want an out of the box solution, Shelly has two devices: the Shelly EM and Shelly 3EM. The Shelly 3EM is a three phase device. Living in the US, you’ll either need two Shelly EM devices or one Shelly 3EM. This is because the US is wired with “split-phase” electric power. I initially thought that I could get away with a single Shelly EM and two CT clamps, one mounted in the opposite direction of the other. However, while this worked for some applications, inductive loads (like a dryer, dishwasher, pump in an espresso machine) caused the reading to go negative! I knew I wasn’t returning power to the grid and this had to be an error. I snagged a second Shelly EM for the second phase, but instead a Shelly 3EM could be used and wired up to only two phases. Note that the Shelly EM has two clamp sizes available — 50amp and 120amp. To determine which is needed for your application, determine the size breaker attached to each phase in your breaker box. The Shelly 3EM only has a single clamp size.
It’s a bit difficult to find information about split-phase applications as the Shelly devices are primarily used in Europe, where split-phase electric power is not used. The issue with trying to use a single Shelly EM for power metering with split-phase is that the voltage reference is taken from a single phase. The second phase is 180 degrees out of phase from that reference, and as such depending on the load (particularly for inductive loads), the chip used in the Shelly EM will calculate negative power usage instead of positive. I tried hacking the Tasmota firmware to make this work, and while it should be possible, there were no configurable options for the chip used in the Shelly EM to make this work. It would be possible to calculate power usage based on the underlying readings taken by the power metering chip, but buying a second Shelly EM was a simpler solution.
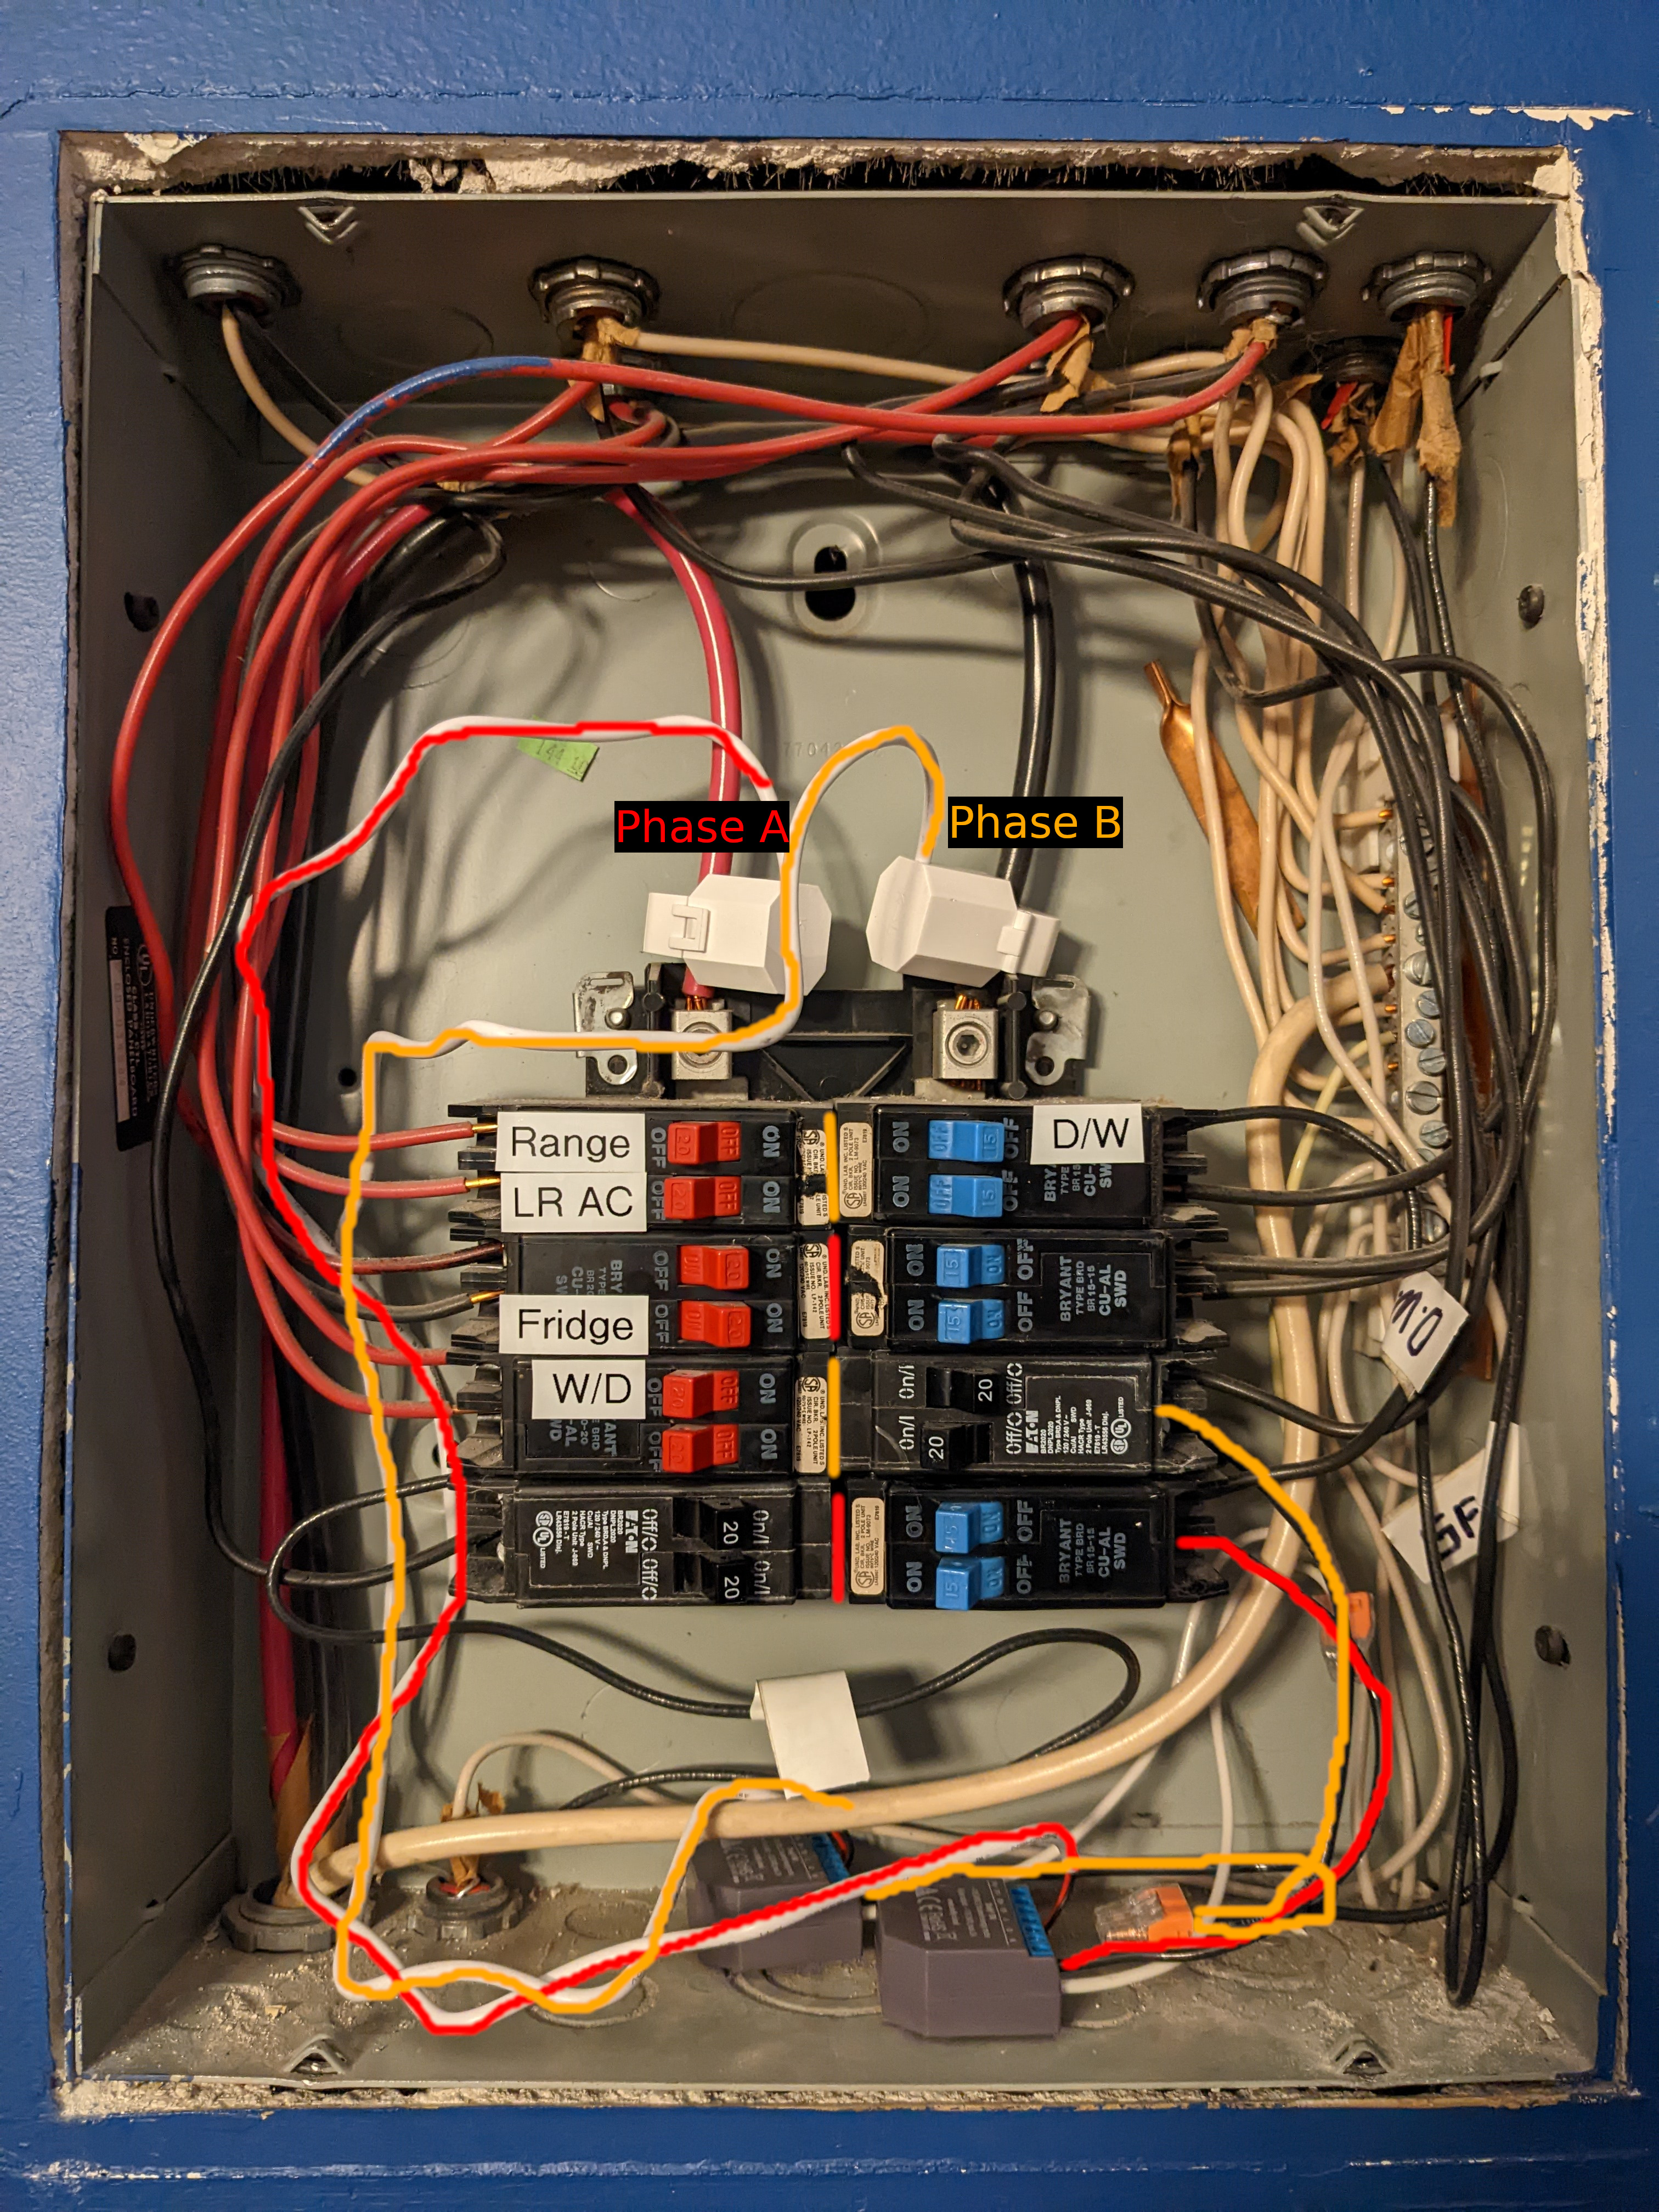
Wiring up the Shelly EM is straightforward. It must be connected to line and neutral. The line that is connected to the Shelly EM must be the same phase that the CT clamp is attached to. This is because of the aforementioned phase calculation to determine power usage. For my installation, I had one spare circuit breaker, which I used to wire up one Shelly EM to phase A. I used a Wago connector to share another breaker on phase B with the second Shelly EM. Note that, as mentioned in previous posts, Shelly devices don’t officially support 12 gauge wire, which is required on 20amp circuits. You’ll want to wire the Shelly EM up to a 15amp circuit in your breaker box to allow the use of 14 gauge wire to ensure the clamps hold the wire securely in your breaker box. I used a second Wago connector to wire up both Shelly EM devices to the neutral bus.
The Shelly EM has the same on-boarding process as all other Shelly devices I’ve written about. When the device starts up it will create a WiFi network that you can connect to. Navigate to http://192.168.33.1 and connect the device to your WiFi network.
With the Shelly EM connected to the network, it can be used as is. However, I ended up flashing Tasmota. I initially did this to see if this alternative firmware would work with the split-phase wiring out of the box. I quickly learned that it didn’t. However, other benefits to the Tasmota firmware include being able to calibrate the CT clamps, improving accuracy of the power measurement readings. There are lots of other tweaks available with the Tasmota firmware as well, though the calibration is the main benefit.
The mogs-to-tasmota project provides the OTA firmware needed to flash the Shelly EM with Tasmota. Once the device is up and running, you’ll need to reconfigure the Shelly EM, now running Tasmota, to rejoin your WiFi network. Similarly to the stock firmware, the Shelly EM will broadcast a new SSID. Tasmota presents a captive portal, which should come up automatically when connecting to the network. Once joined to your network, browse to the IP of the device. You’ll be presented with a rather bare interface. Tasmota needs to be configured with a “template” in order to control the device. Note that the mogs-to-tasmota has an outdated template entry for the Shelly EM. The correct template can be found here. The template is configured by going to Configure, Configure Other, then pasting in the template. Be sure to check the Activate button, else the template won’t take effect. You’ll also want to give the device a meaningful name. Click Save and the device will reboot.
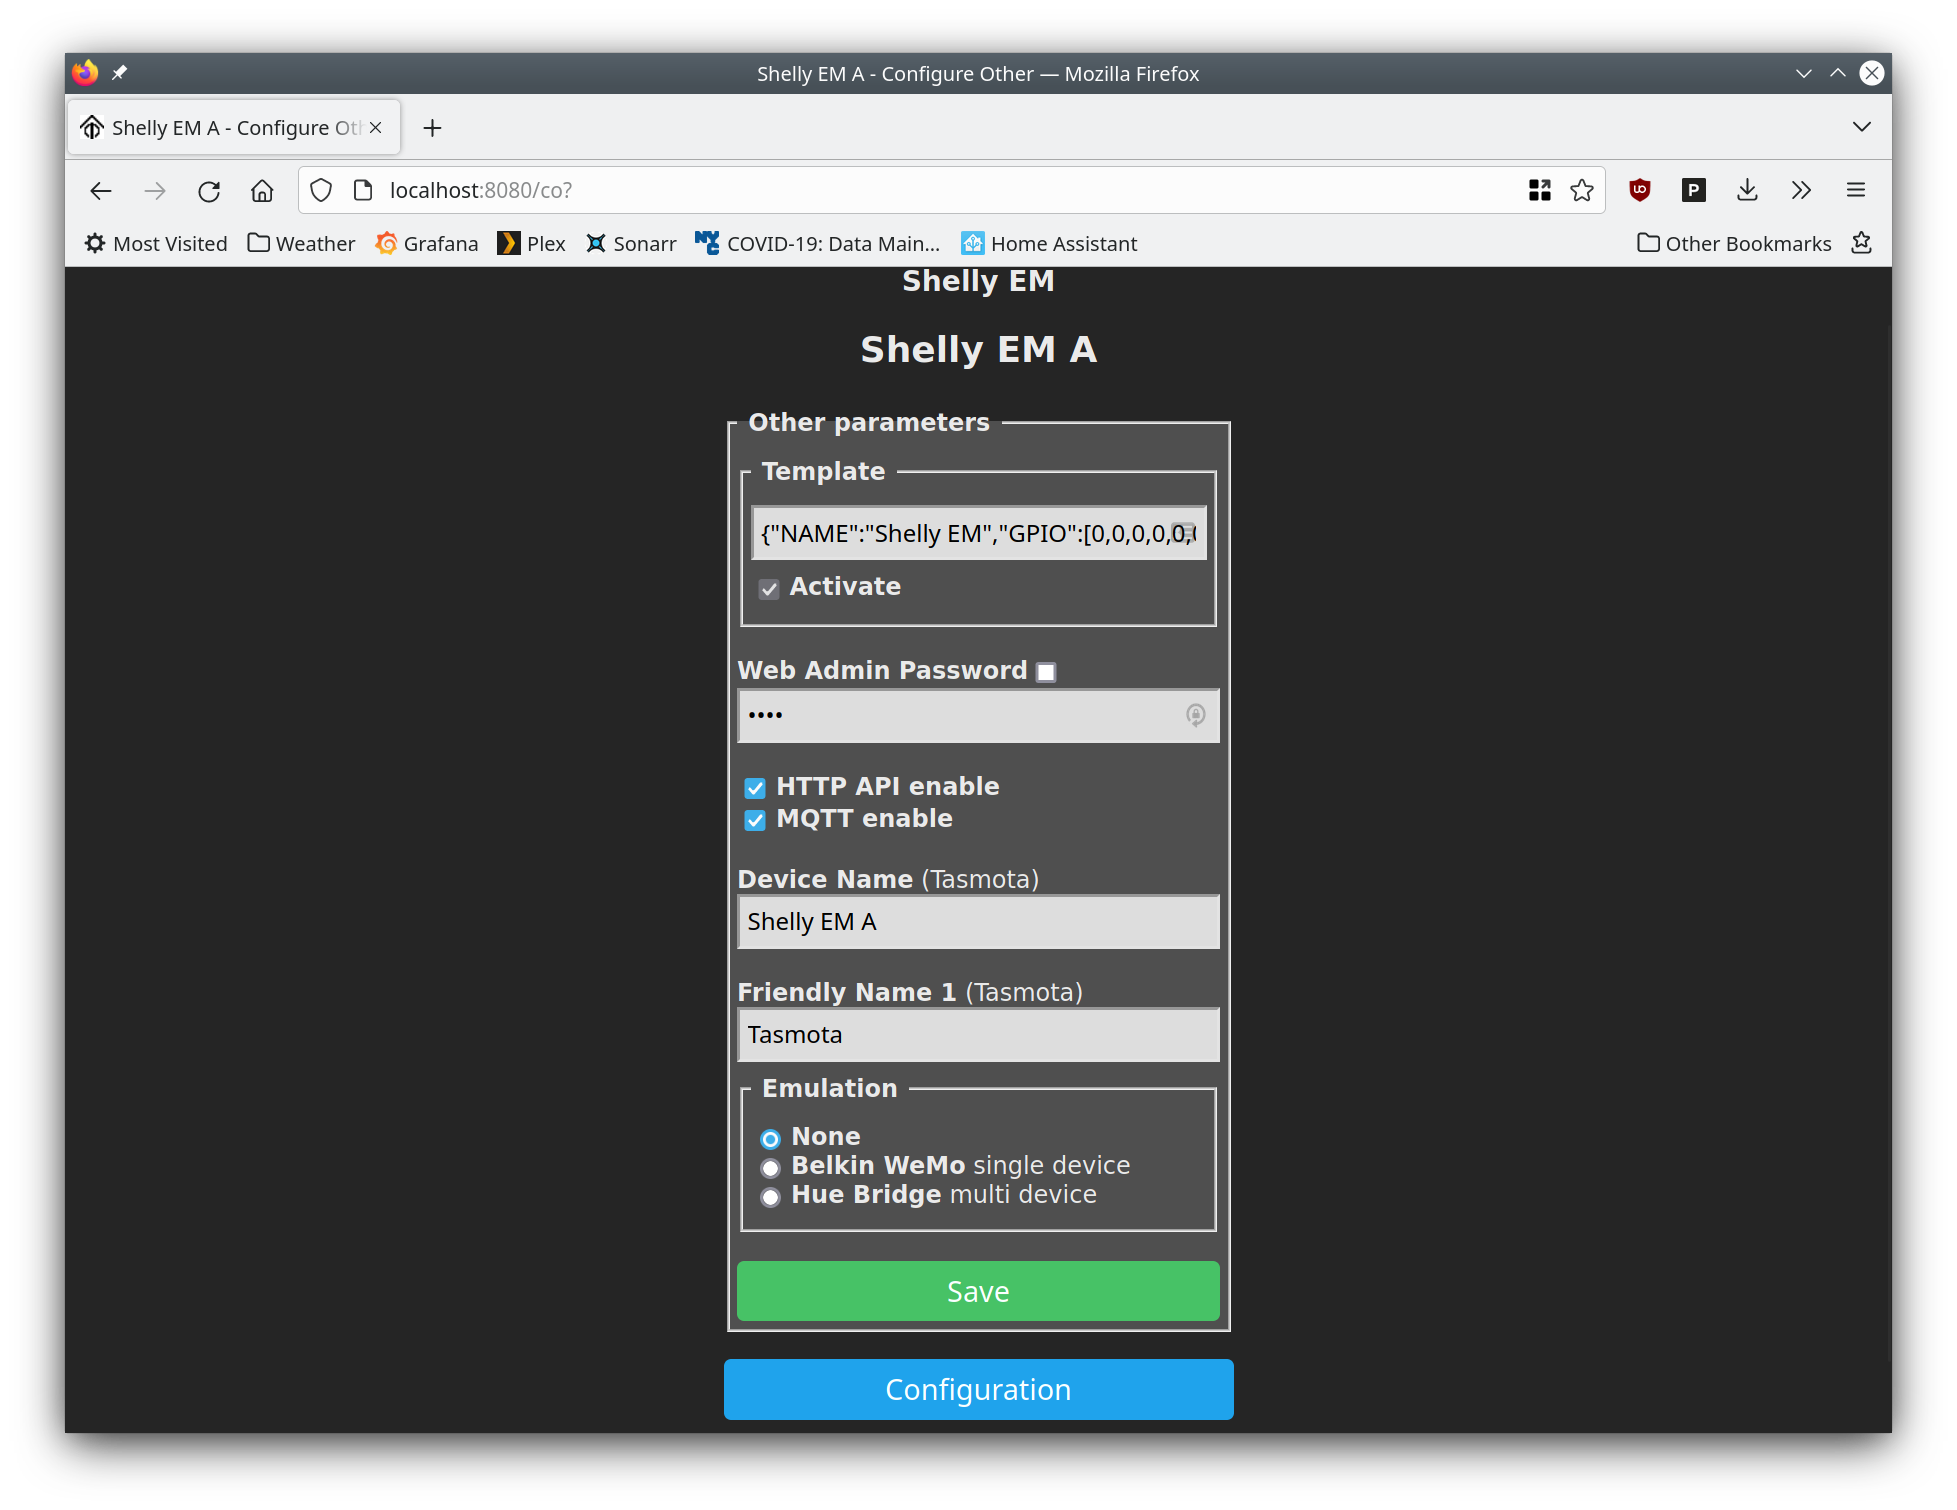
Power metering is disabled by default on Tasmota when the relay is off. This wasn’t desirable for me and can be configured by going to the console and running the command SetOption21 1. If this doesn’t immediately show the power metering on the main screen, try resetting and rebooting the device.

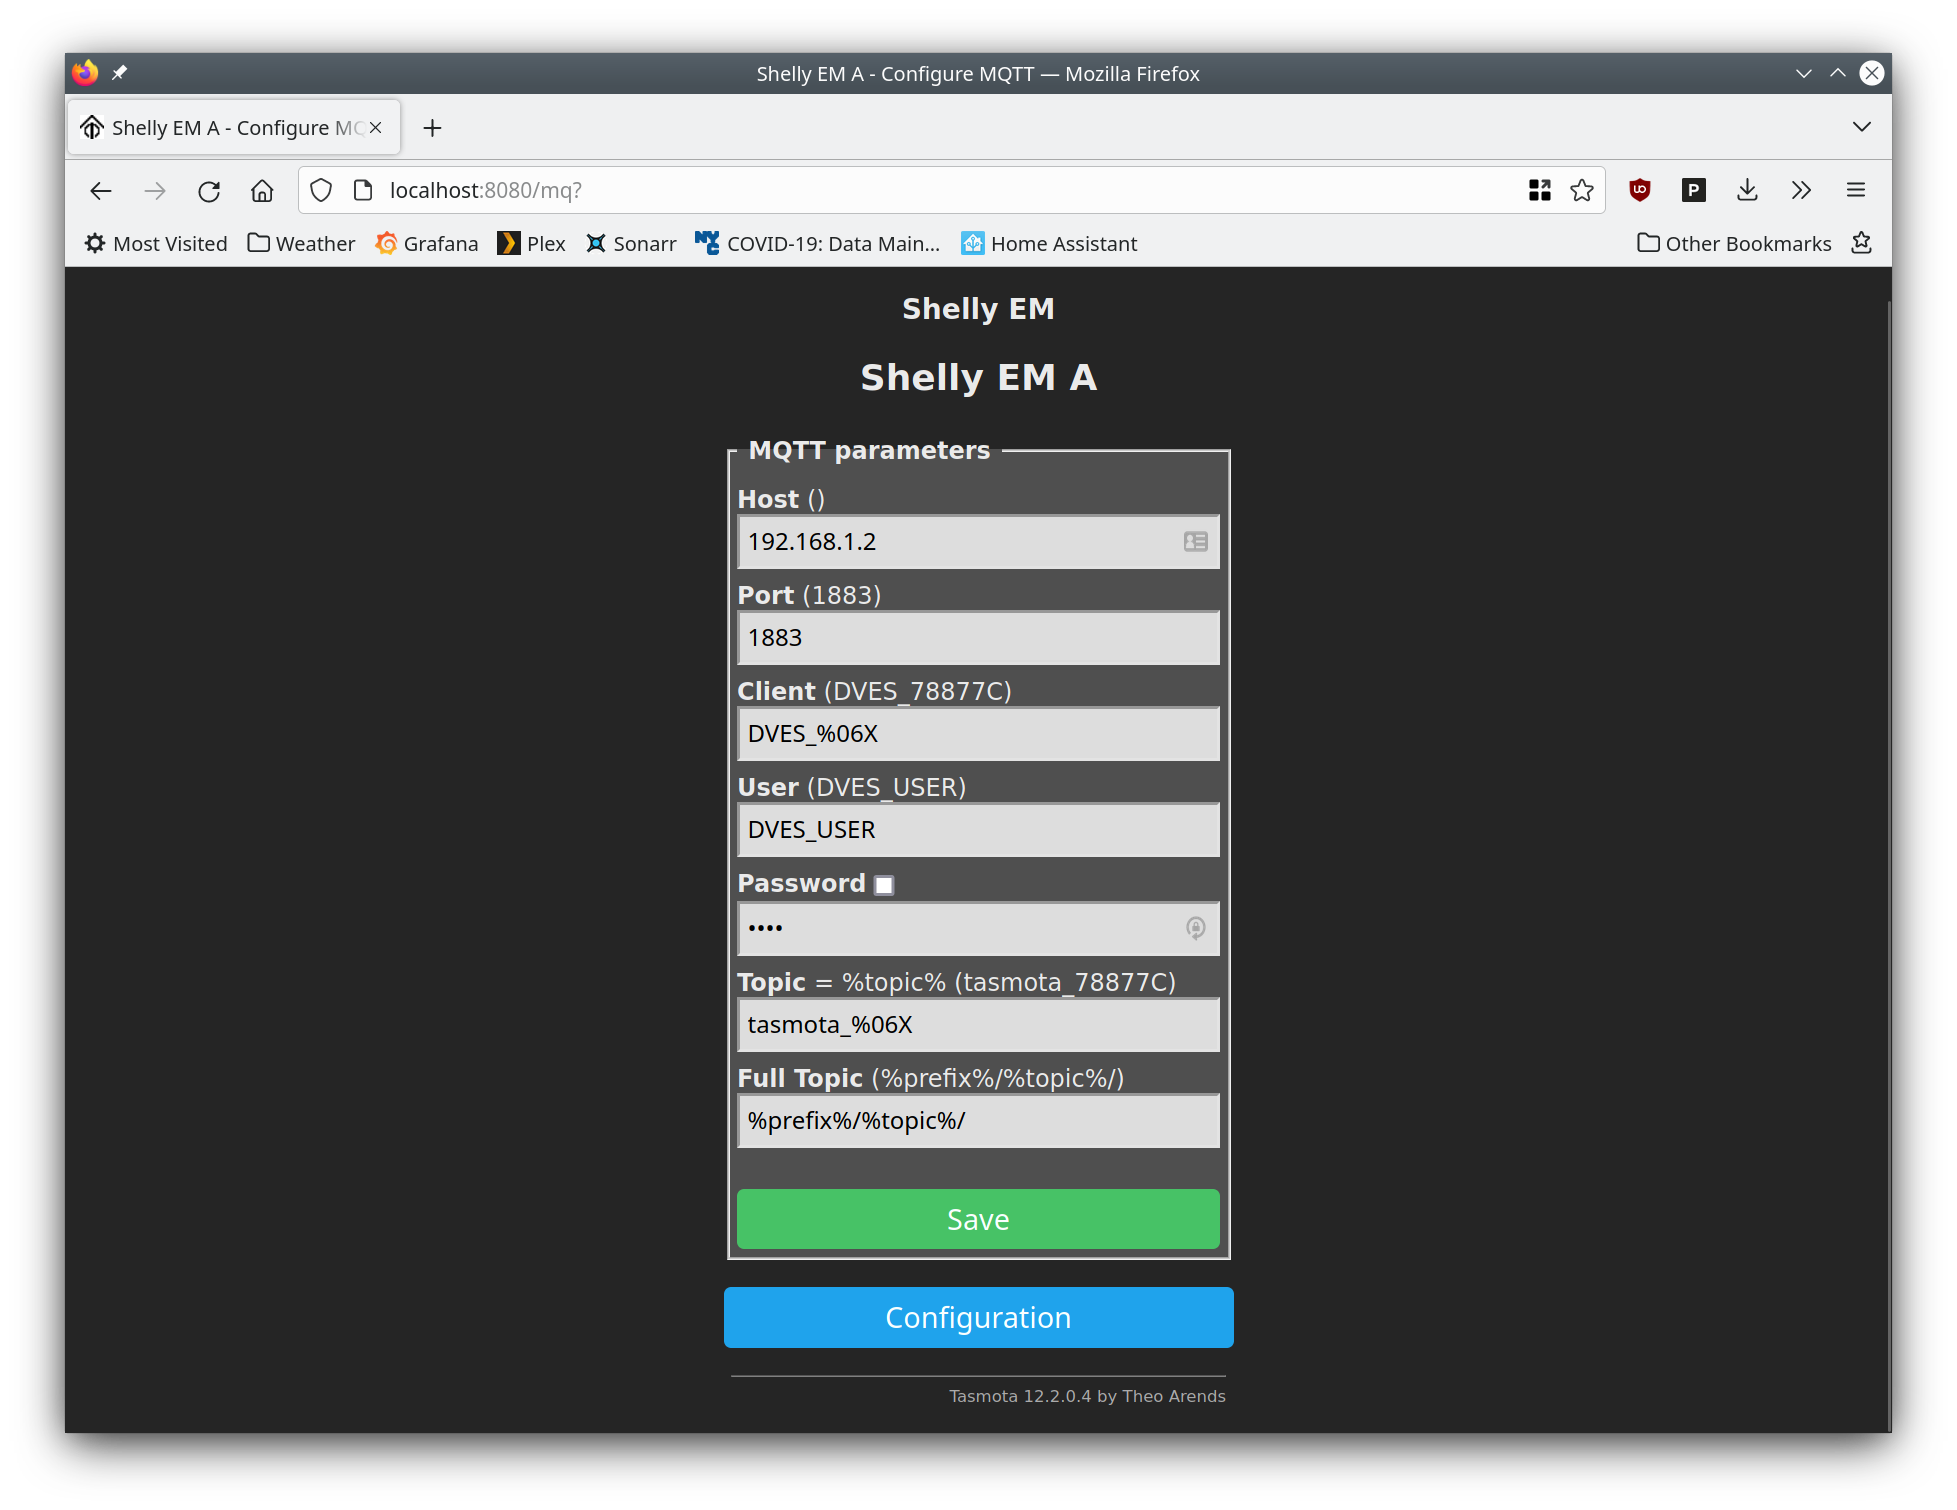
With the device now showing power usage, it now needs to be configured to send data to Home Assistant. This is done via MQTT. You need to have an MQTT broker and integration set up with Home Assistant. If your Home Assistant supports addons, then you can simply install the MQTT addon. Otherwise, you’ll need to run an MQTT broker and configure that in Home Assistant. I’m using the eclipse-mosquitto container image to run an MQTT broker in Docker. It’s configured using host networking, as is my Home Assistant container, and I’ve therefore configured the Home Assistant MQTT integration to use localhost.
With Home Asistant and an MQTT broker up and running, configure MQTT on the Shelly EM. From Configuration, select Configure MQTT. Enter your MQTT host (I used the IP address of my Home Assistant box, running eclipse-mosquitto). I left all other options with their defaults. At this point you can go back into Home Assistant and add a Tasmota device. Everything should auto-detect and you should now have the Tasmota devices showing up in Home Assistant!
At this point it is useful to perform power calibration on the Shelly EM — something that is possible with Tasmota but not the default firmware. You’ll need some way to determine the actual power usage, or a device with a known power factor of 1 and known wattage (e.g. an electric kettle, Espresso machine, etc.) I have a plug in power meter that can be used to properly set the required calibration commands PowerSet, VoltageSet and CurrentSet. The Tasmota documentation describes how to perform the calibration process if a power meter is not available. These commands are executed in the Console.
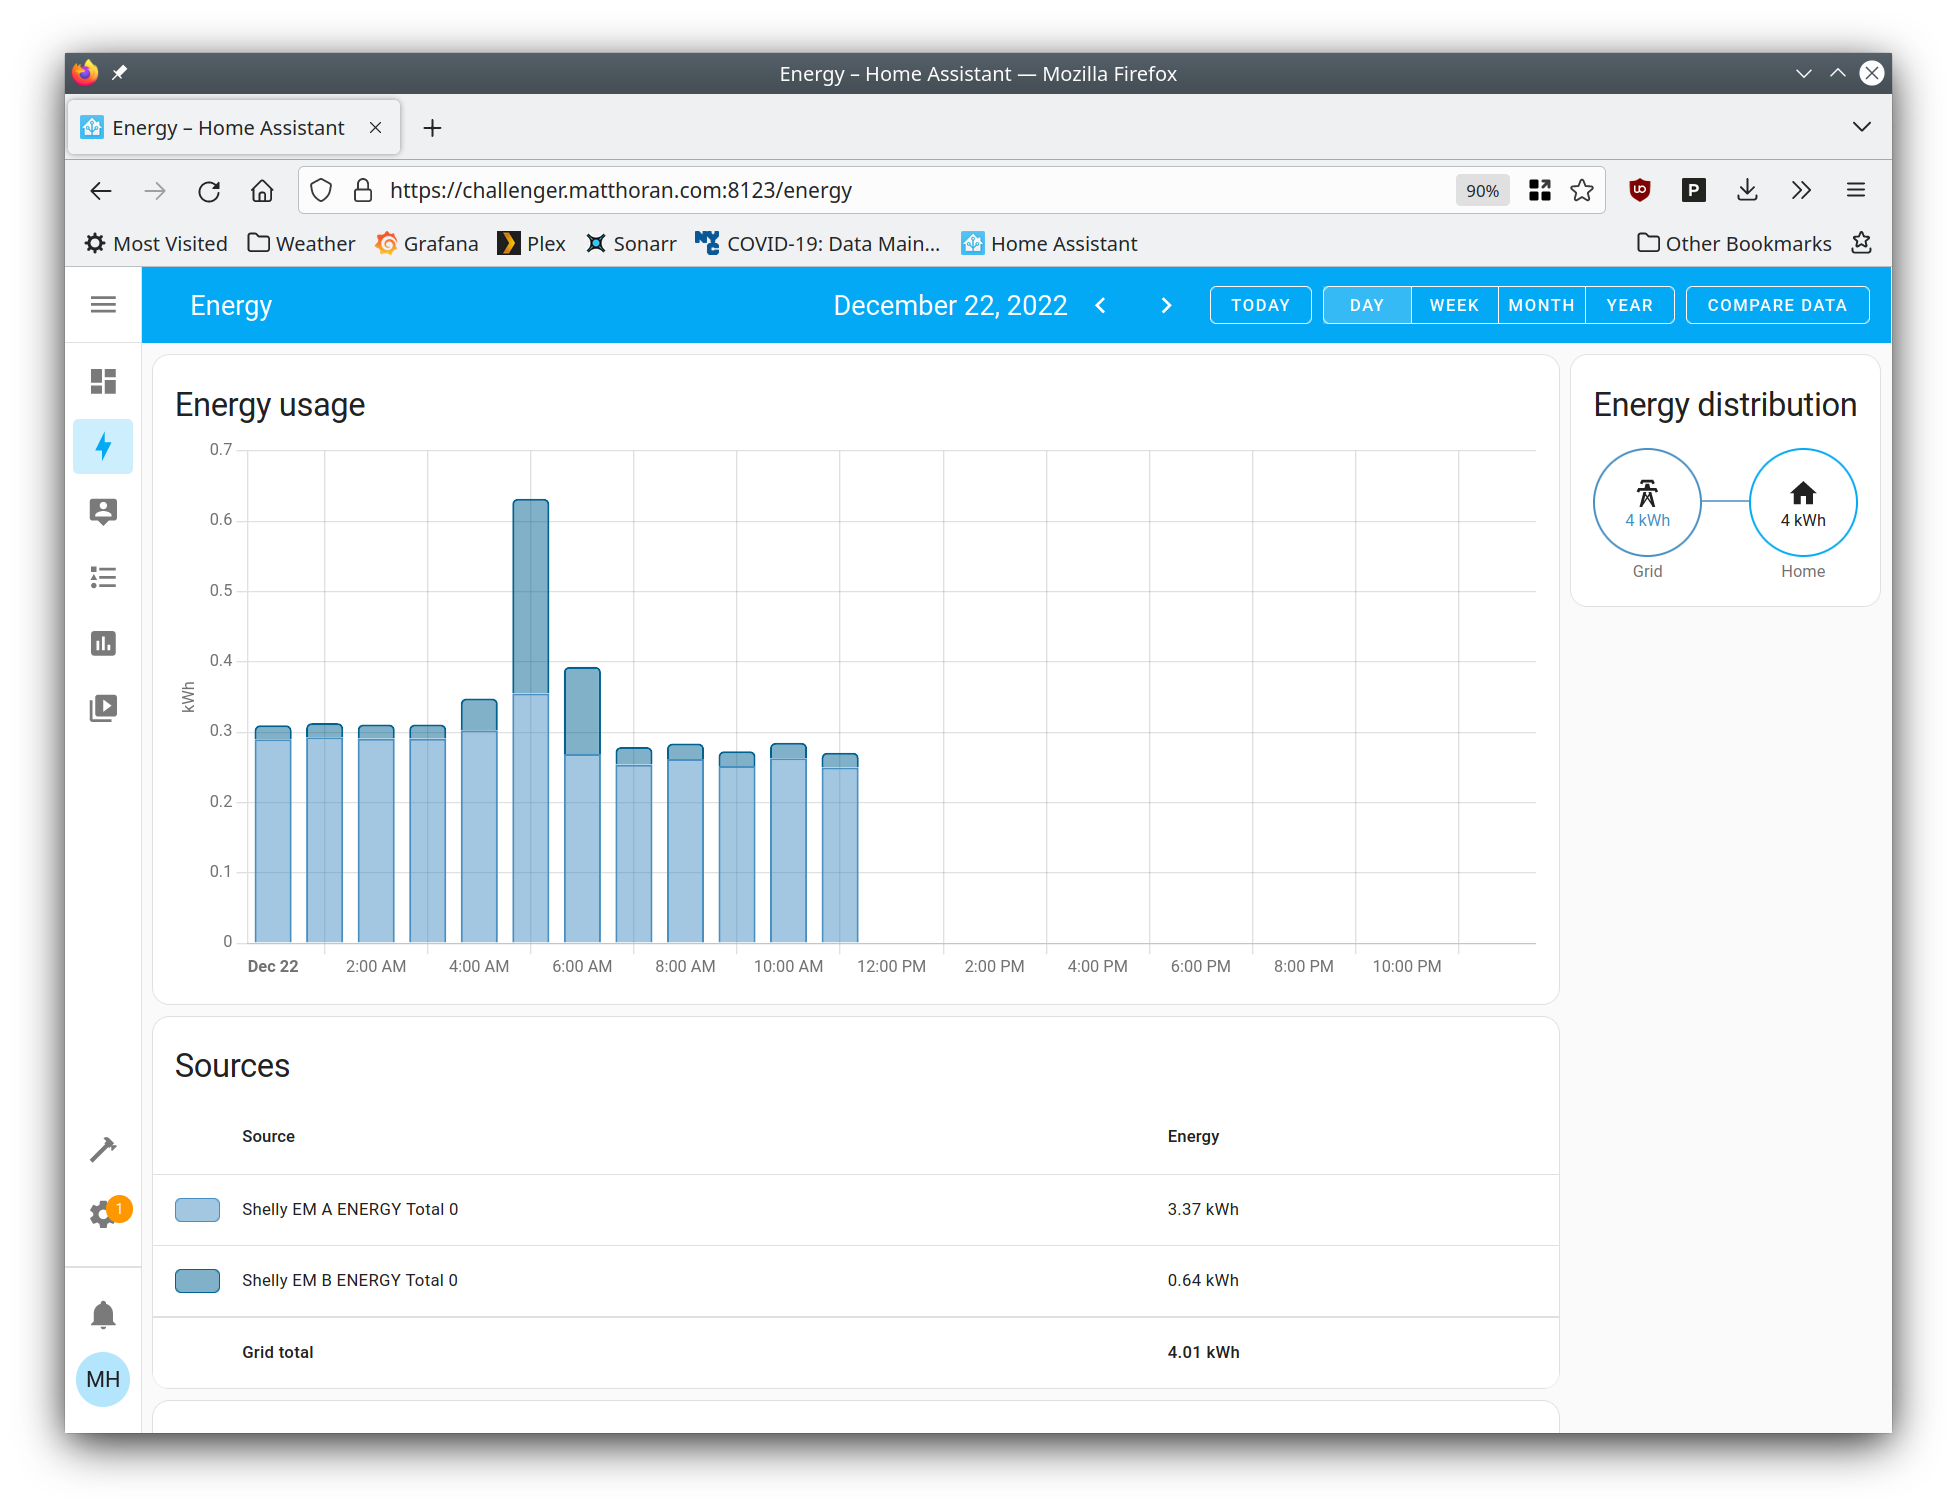
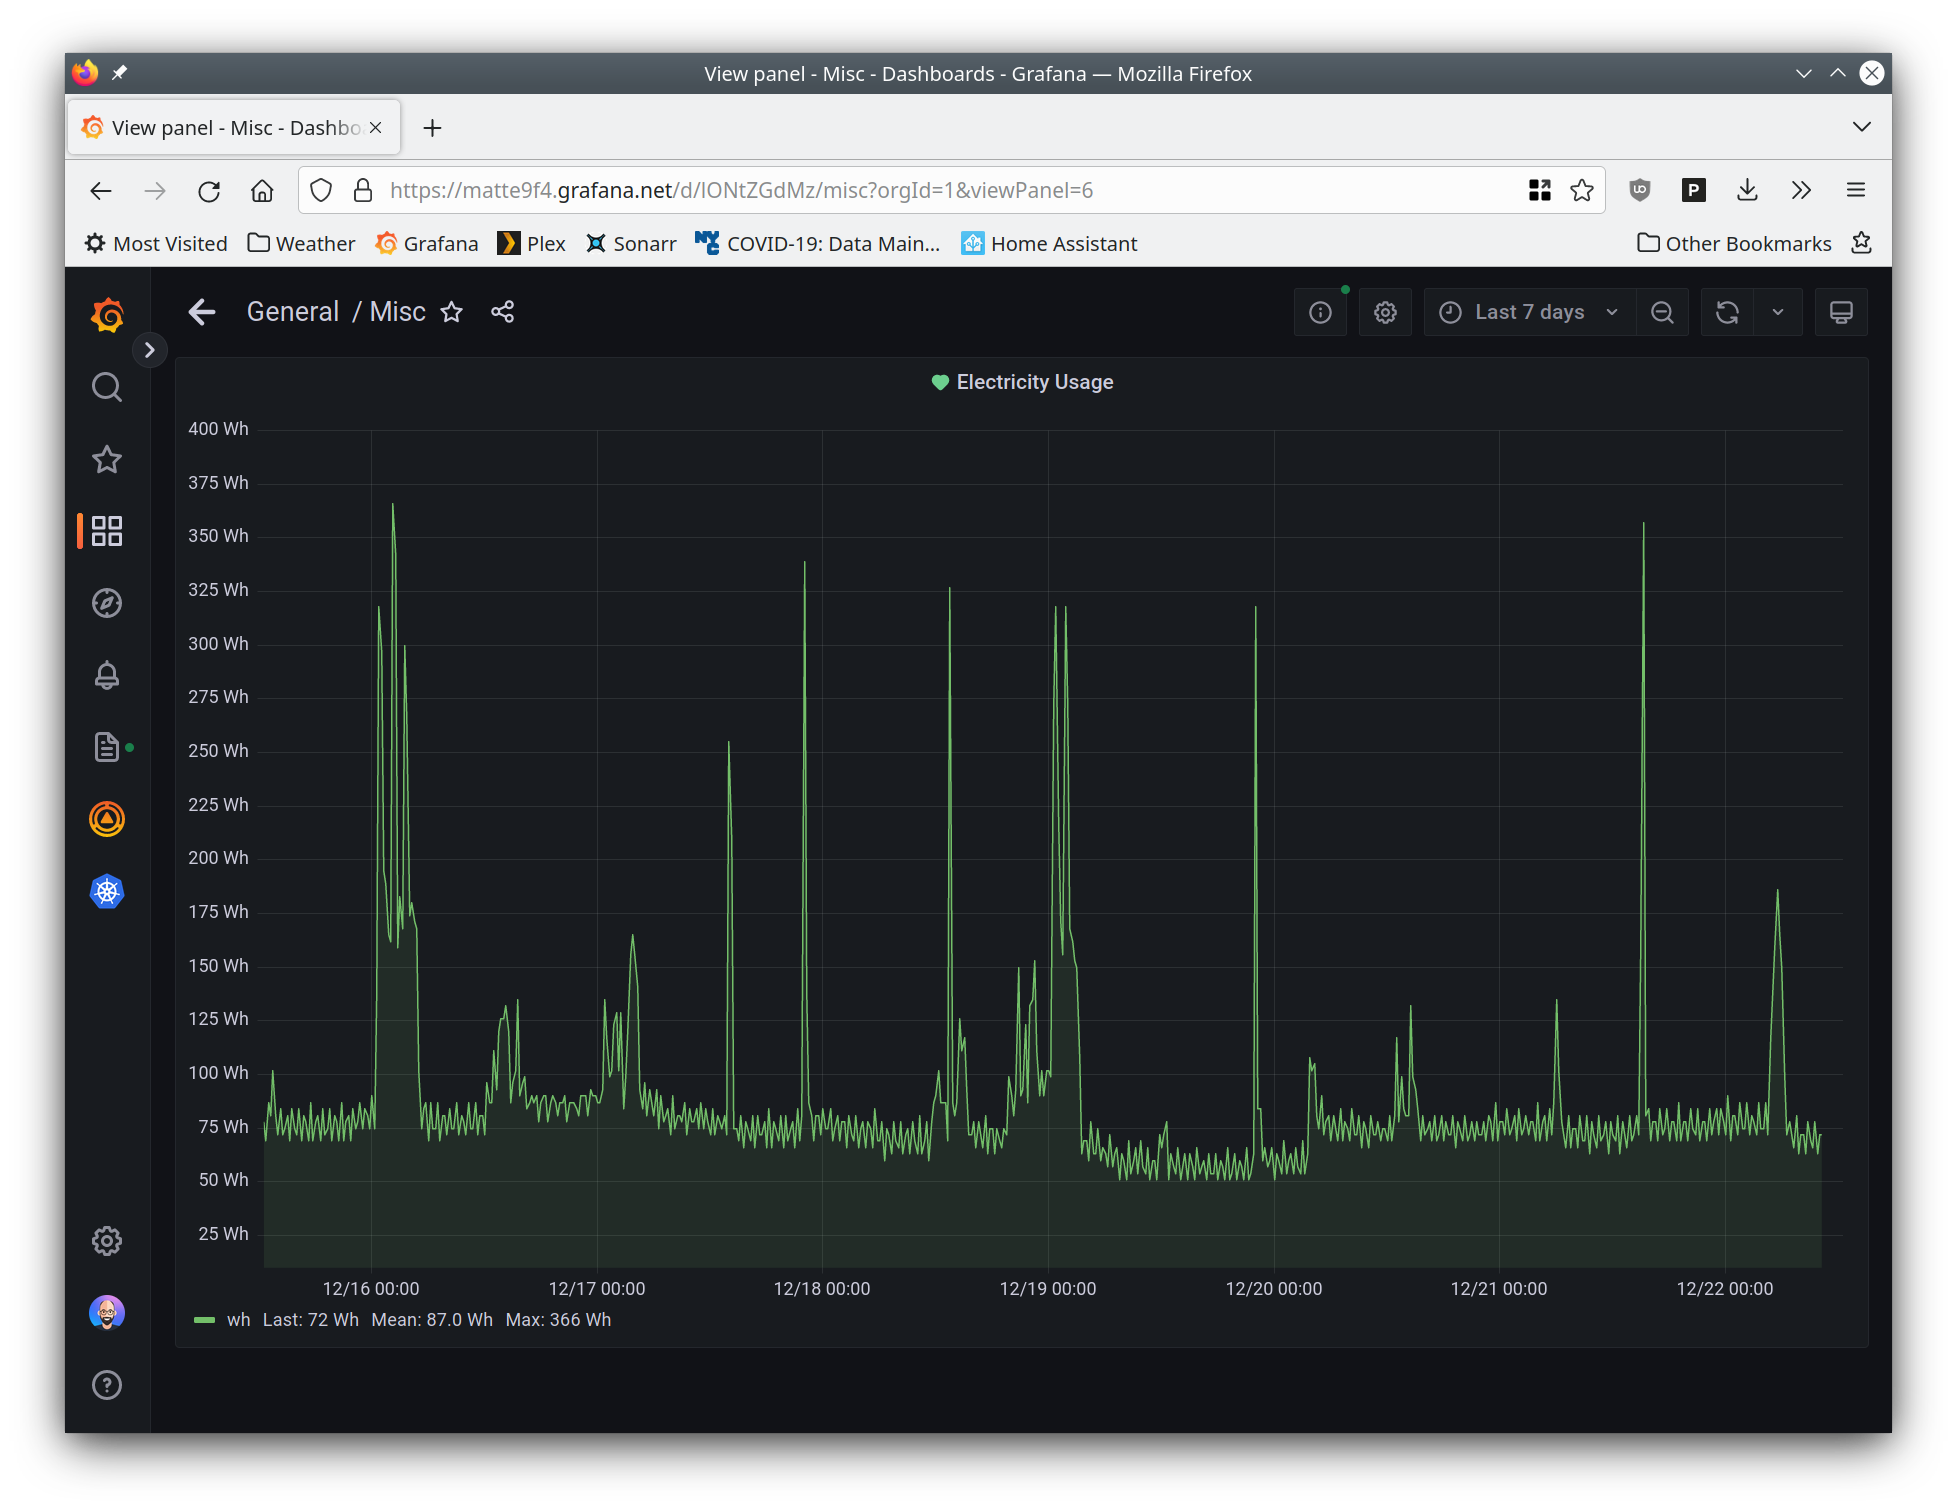
Once everything is up and running, it’s possible to add the Shelly EM readings to the energy dashboard. The two phases are added as grid consumption and are added together to show the total. If additional Shelly devices with power metering are installed, they can be added to the energy dashboard to show more specific information. I also created another dashboard that lets me easily read instantaneous usage, so I can determine what devices are using the most power at what time. I’ve noticed some interesting patterns in energy usage and can use that to check against the readings that are reported by ConEd’s real-time usage. I’ve found the Shelly EM readings to be pretty accurate when compared to my utility bill.