Remote Door Buzzer with Home Assistant
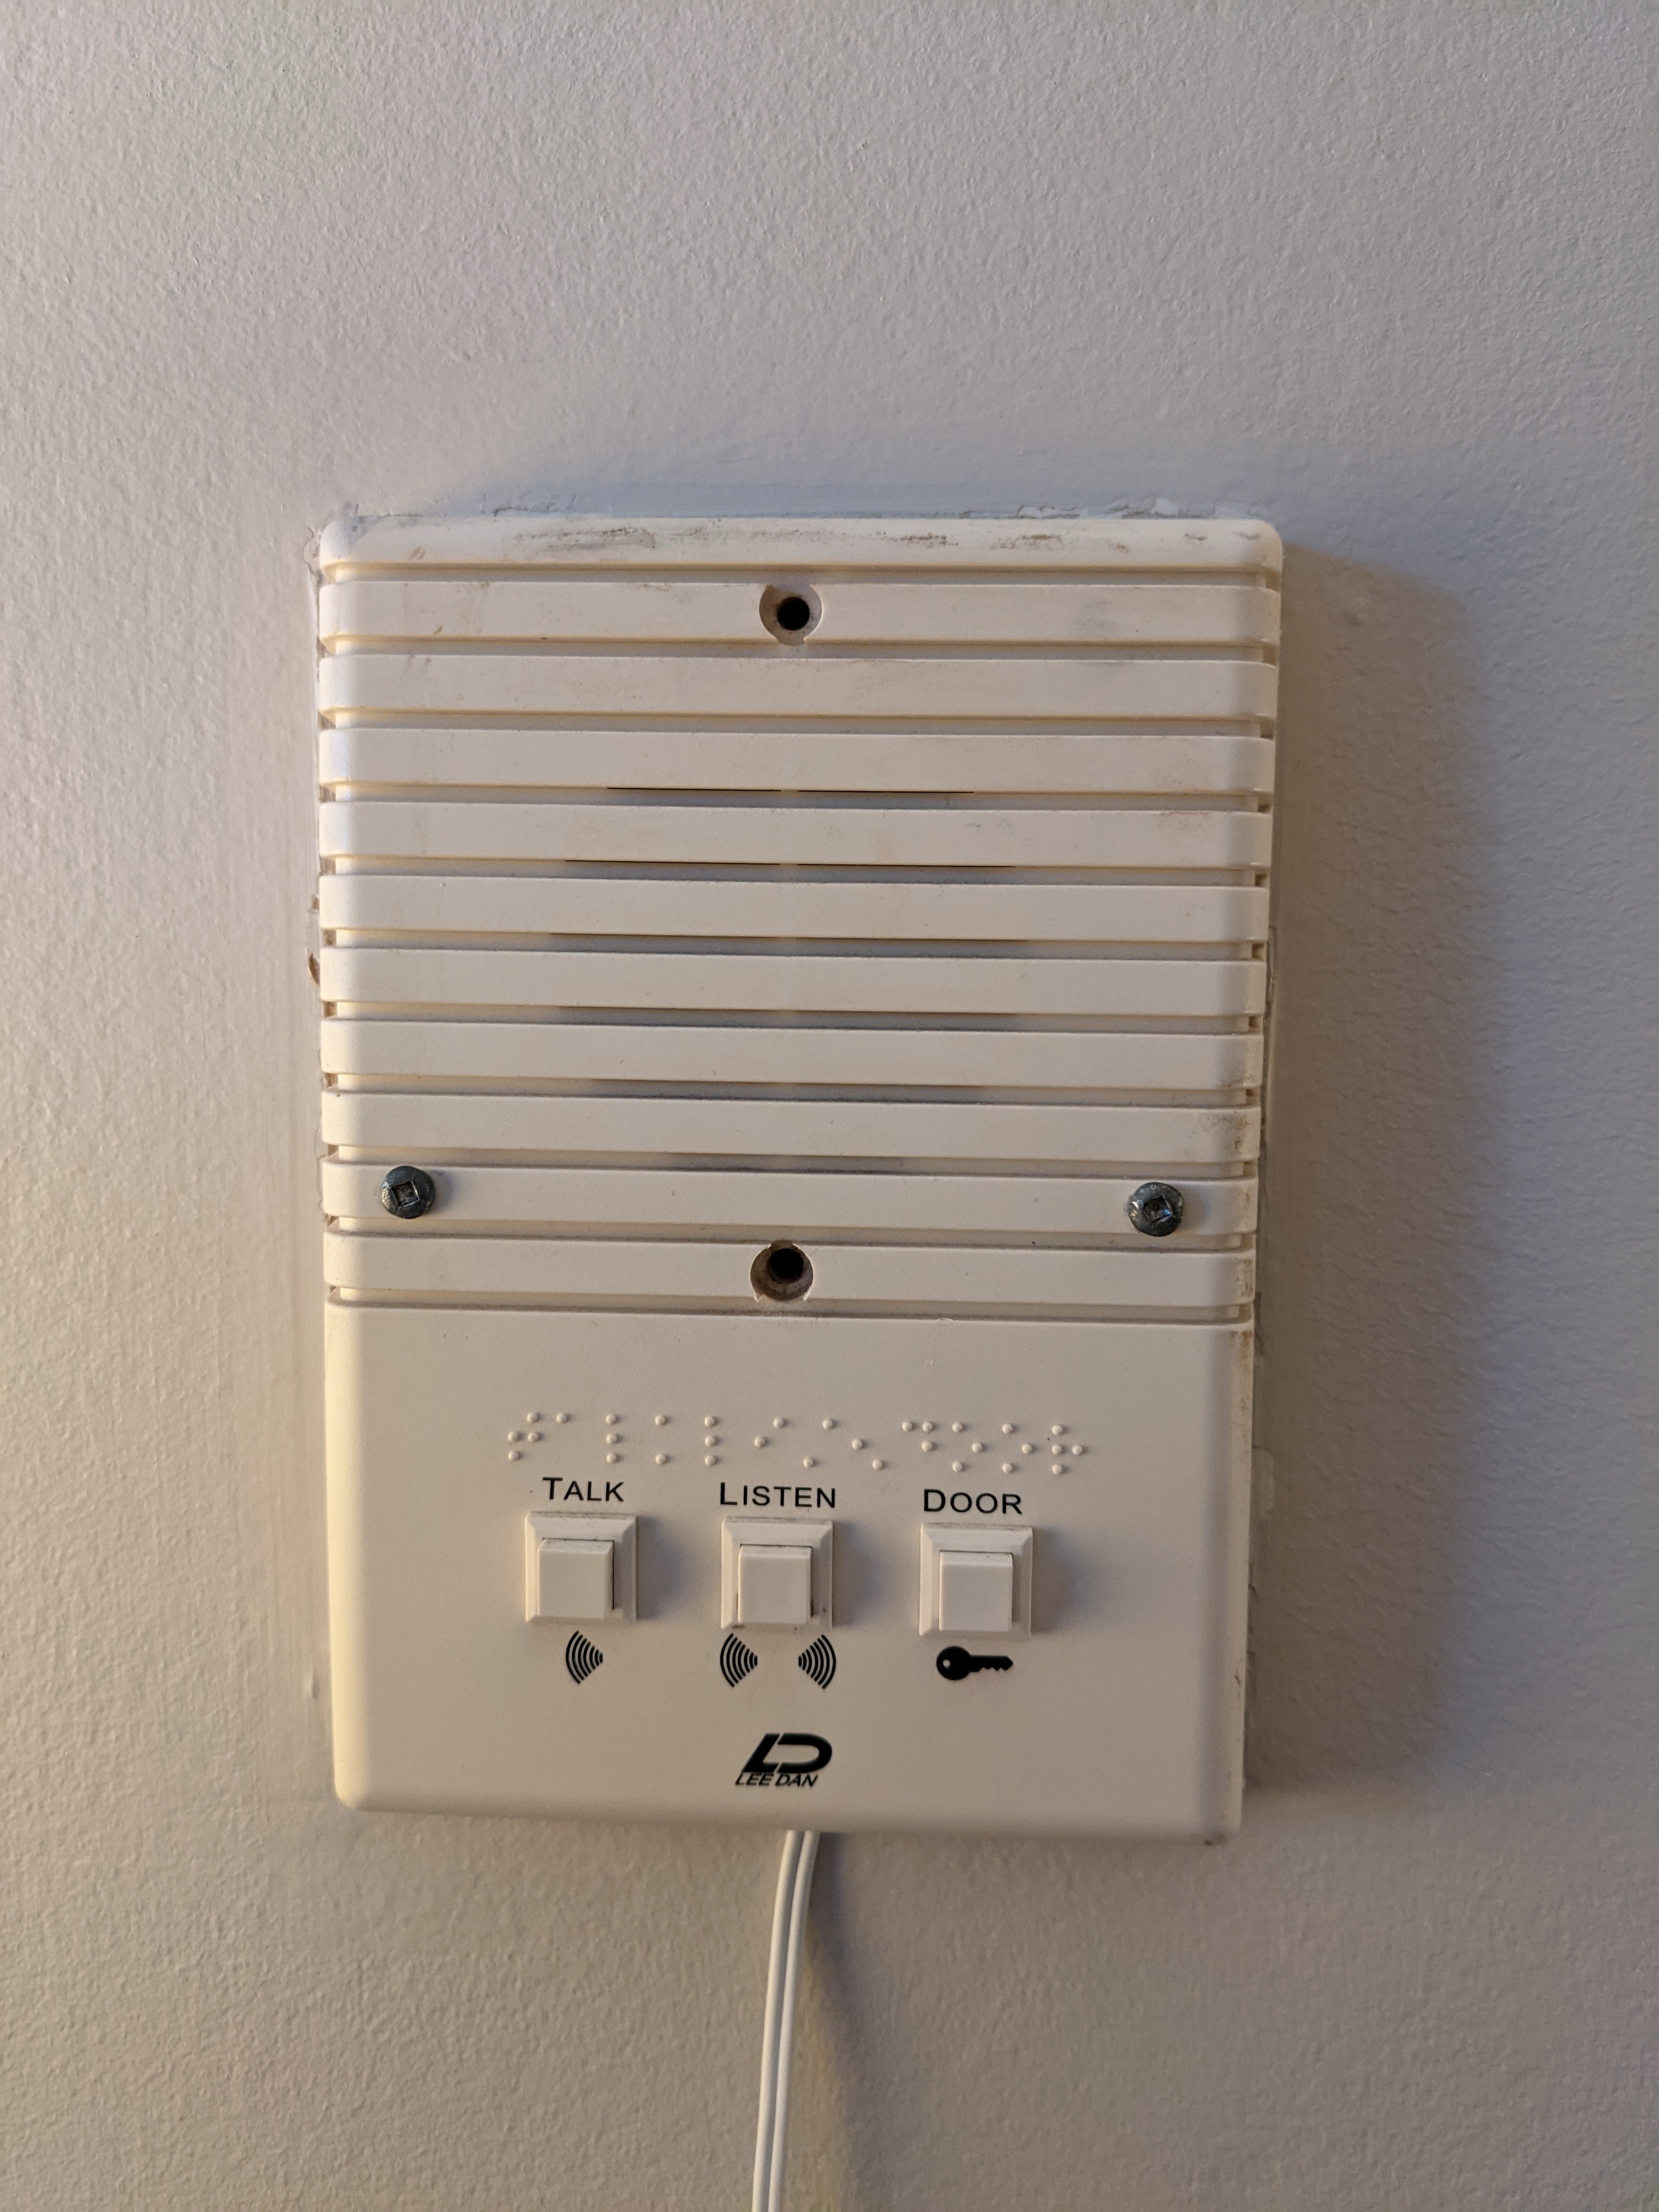
Over a year ago I bought a Shelly 1 relay with grand plans: set up a remote door buzzer for my apartment. I live in an apartment building with an intercom system (see below.) The front door can be unlocked from a central control panel in my apartment. However, I’m not always in the living room where the control panel is located when someone calls my apartment. Also, sometimes I’m at the front door and my keys are inaccessible. Since I don’t have a fancy remote controlled door opener, I wanted to come up with my own solution.
The Shelly 1 relay is a simply AC or DC powered relay that can switch pretty much anything. The reason I sat on the project for so long is that I didn’t have a spare DC adapter to power the relay. I finally purchased the necessary adapter and set everything up.
The Shelly connects to a 2.4 GHz WiFi network. This was perfect for me, as this project was my first real foray into home automation. I had already setup Home Assistant to scrape my Awair air quality monitor, but not much else. Home Assistant is a free and open source home automation platform with a focus on local control and privacy. This is exactly what I wanted to control my devices, as most home automation platforms don’t have a great track record.
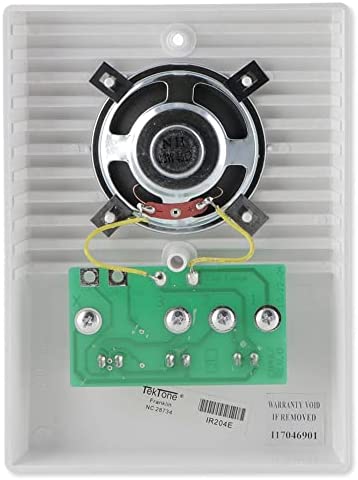
Wiring up the intercom panel to the relay was easy. I unscrewed the panel from the wall and inspected the circuit board. I found that the unlock button shorted the 2 and 3 terminals. Therefore, I ran some telephone wire from the 2 terminal on the panel to the I terminal on the relay, and from the 3 terminal to the O terminal on the relay.
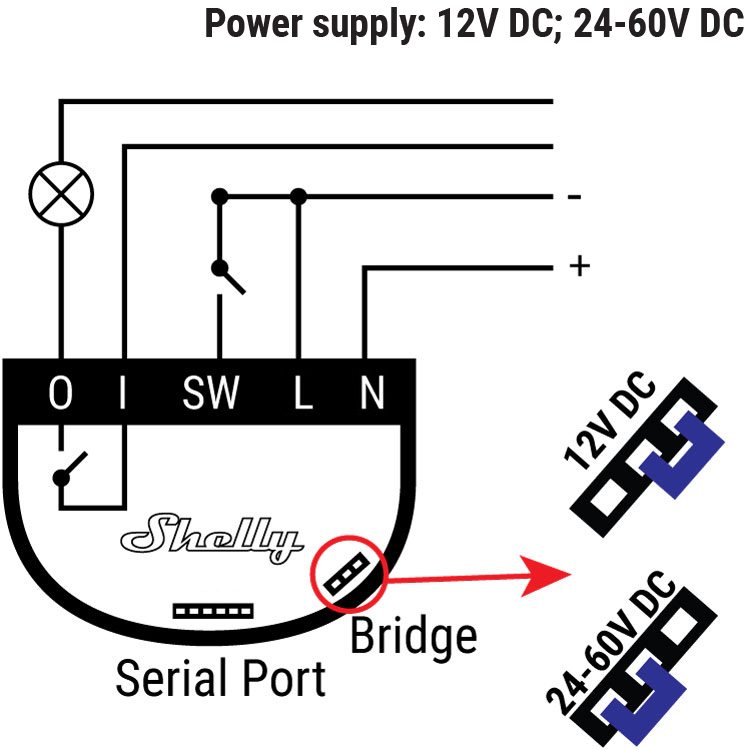
To power the Shelly relay from a 12 volt adapter, I wired the + terminal of the adapter to the N terminal of the relay, and the - terminal of the adapter to the L terminal of the relay. I also had to switch the jumper from the left pins to the right pins as depicted below.
When the Shelly relay starts up for the first time, it will create its own WiFi network. Connect to this with a device and navigate to http://192.168.33.1/ in a browser. From there you can set up the device and connect it to your WiFi network. Alternatively, the Shelly app can be used for initial setup.
I chose to give my relay a static IP address on the network to improve stability. This can be configured under “WiFi Mode - Client” on the “Internet & Security” page. I also changed the CoIoT peer under “Advanced - Developer Settings” to the IP of my Home Assistant instance and port 5683, instead of mcast. I found that this also improved stability.
Since I wanted the door to stay open for a period of time when triggered, but then lock automatically, I set up a timer. On the “Timer” page I selected “Auto Off” and entered 10 seconds. This is the equivalent of holding the unlock button on my intercom for 10 seconds, just enough to make it through the two front doors and into the lobby even if you’re carrying a few things.
Under settings, I also made sure that “Power On Default Mode” was set to off. I wanted the relay to fail safe, keeping the front door locked.
With the relay all set up it was time to configure everything in Home Assistant. So long as your relay is on the same network as your Home Assistant instance, Home Assistant should autodetect the relay. If not, it can be manually added under “Devices & Services”.
On my home dashboard I added a button with the following configuration:
show_name: true
show_icon: true
type: button
tap_action:
  action: toggle
entity: switch.shelly1_e8db84d68457
name: Front Door
icon: mdi:door-open
show_state: false
Change entity and name as appropriate.
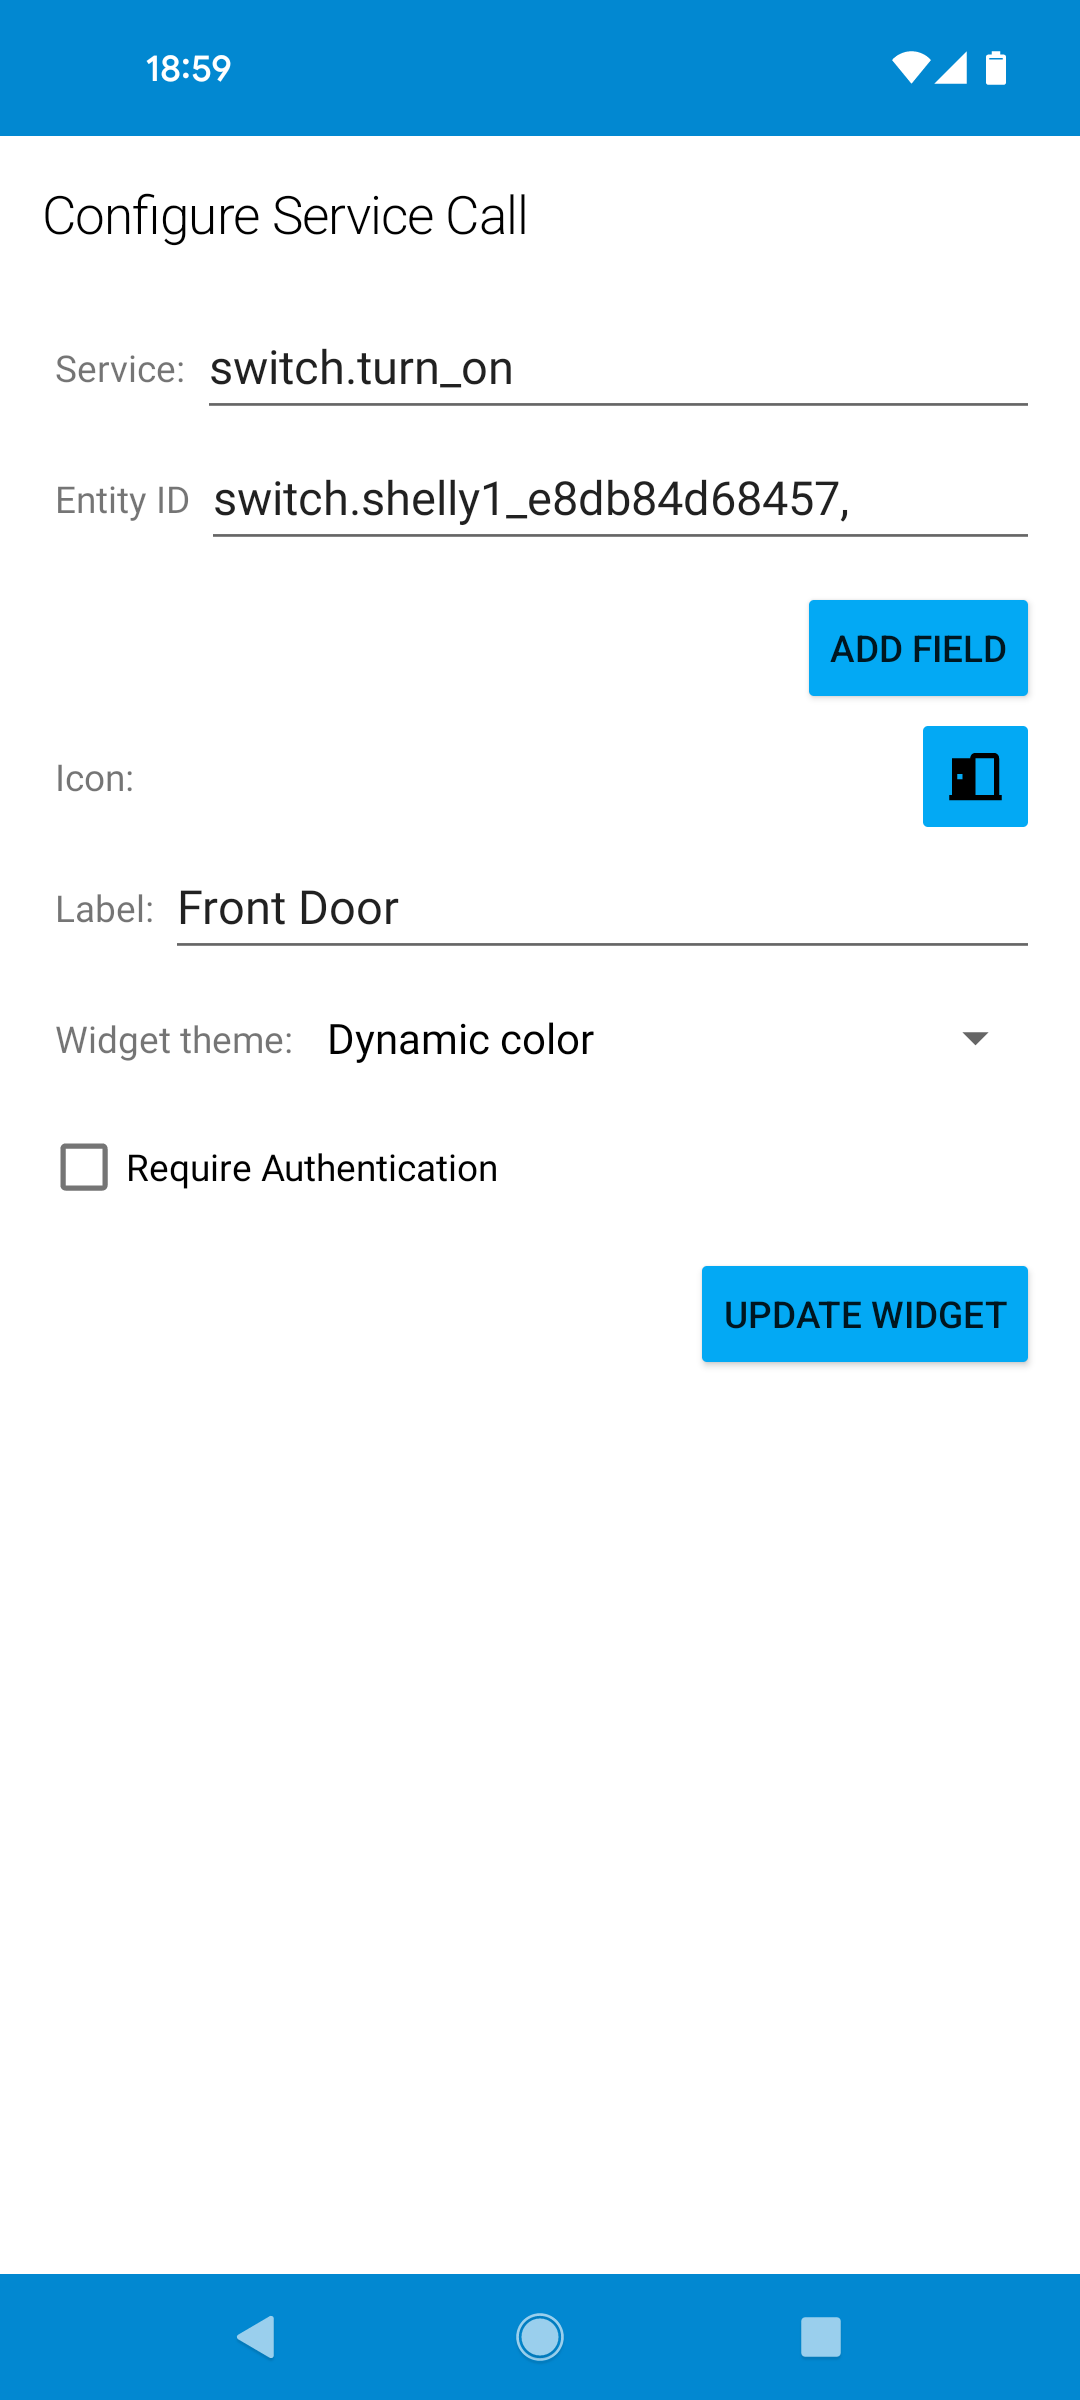
I also added a widget to my Android home screen. Unfortunately the widgets can’t control an existing button from a dashboard, but it’s easy enough to set up a switch entity as shown below:
This project was a lot of fun and caused me to catch the home automation bug. Stay tuned for a post on how I keep track of the number of espresso shots I’ve made to ensure that I don’t run out of coffee beans.